ball detection

How to Use OpenCV for Ball Detection

RoboCup SPL Use Case

Introduction

In this tutorial, we will use a supervised method for detecting an object in an image. In particular, we will train a Linear Binary Pattern (LBP) classifier and we will use it for detecting a black and white ball.

The use case of the RoboCup Soccer Standard Platform League is used to demonstrate the approach.

Goals

We will learn how to:

1. Create a data set with positive and negative samples
2. Train a binary classifier
3. Detect the object of interest

Data Set Creation

To train the binary classifier we need a positive and a negative set of images.
 

positive images icon

Positive set

It is crucial to generate accurately the positive set to obtain good results. We need to select image patch containing the object of interest trying to mantain the same proportion for each selected patch. To this end, we can use a graphical tool to crop the images. Cropping is a tool for creating image patches that can be used for machine learning with Haar or LBP based classifiers. Cropping allows to select with the mouse and to save image patches with a constant proportion, which is crucial for generating a good positive sample set.

An example of positive sample set containing image patches of black and white balls captured from the top camera of a NAO robot is available here.

Additional images can be downloaded from the SPQR Team NAO image data set.


negative images icon

Negative set

The images that are included in the negative set do not have to contain the object that we want to detect. If we know in advance which will be the application scenario for our detector, then it could be good to use images taken from it. The number of negative samples to use should be bigger than the number of positive samples. Generally, a proportion of 2:1 between negative and positive samples is considered accettable, i.e., if the number of positive samples is 2,000 then the negative samples sould be at least 4,000.

An example of negative sample set containing no black and white balls captured from the top camera of a NAO robot is available here. Part of the images in this negative data set has been provided by the Multi-Sensor Interactive Group at the University of Bremen (Germany).

Additional images can be downloaded from the SPQR Team NAO image data set.

Training

In this tutorial, we use an approach based on OpenCV for the cascade classifier training. The details about the OpenCV approach can be found here.

We assume the following directory structure:
/balldetection
    pos_top
        img1.png
        img2.png
        ...
    neg_top
        img3.png
        img4.png
        ...
    createpos.cpp

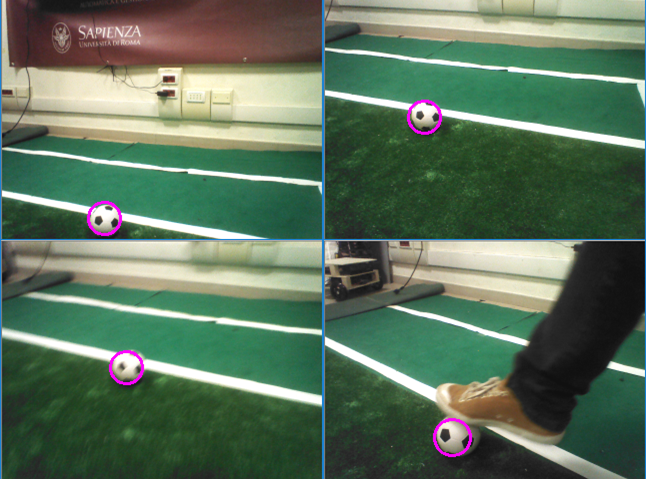
Create the positive training data

All the image patches in the set of positive samples have to be listed in a text file. This text file should be formatted to adere to the needs of the OpenCV function opencv_createsamples

You can use the C++ file createpos.cpp to create a file named "positives.txt" in a format suitable for OpenCV. Use for example g++ createpos.cpp -o createpos -lws2_32 for compiling it under Windows with MinGW.

The command lists for creating the text file is:

cd balldetection

createpos pos_top

opencv_createsamples -info positives.txt -w 16 -h 16 -vec pos.vec -num 2728

where
  • positives.txt contains the list of the positive patches that will be used for training the classifier
  • w is the width of the search window
  • h is the height of the search window
  • vec is a vector file of positive samples in the OpenCV format
  • num is the total number of positive samples

We experimentyally found that 16x16 is a good window size for our application scenario where we wantto find a black and white ball. If you need to detect a bigger object maybe a bigger window size (e.g, 24x24) could work better, or if you want to detect a rectangular object (e.g., a banana), then you could decide to use a rectangular window like 60x30.

Once completed the above steps, our directory structure is:
/balldetection
    pos_top
    neg_top
    createpos.cpp
    positives.txt
    pos.vec

Create the negative training data

All the images in the set of negative samples have to be listed in a text file. For example, in Windows the command lists for creating the text file is:

dir /b/s .\neg_top\*.png > negatives.txt

Once completed the above steps, our directory structure is:
/balldetection
    pos_top
    neg_top
    createpos.cpp
    positives.txt
    pos.vec
    negatives.txt

Train the classifier

To train the classifier it is possible to use the OpenCV method opencv_traincascade, but before we need to create an empty folder named "classifier".
Our directory structure is now:
/balldetection
    classifier
    pos_top
    neg_top
    createpos.cpp
    positives.txt
    pos.vec
    negatives.txt

opencv_traincascade -data classifier -vec pos.vec -bg negatives.txt -numStages 20 -minHitRate 0.999 -maxFalseAlarmRate 0.5 -numPos 2728 -numNeg 16000 -w 16 -h 16 -mode ALL -precalcValBufSize 256 -precalcIdxBufSize 256 -acceptanceRatioBreakValue 10e-5 -nonsym -baseFormatSave -featureType LBP

For the meaning of the parameters please refer to the OpenCV documentation. It is important to note the use of the parameter nonsym since in the case of the black and white ball the pattern is not symmetric in all possible views.

An example of a classifier generated with the OpenCV tools is available here.

Two pre-trained classifiers (one for the top and one for the bottom camera) can be downloaded from the SPQR Team NAO image data set web page.

Detection

The detection of the object of interest can be carried out on single images by using the cascade classifer generated as decribed above.

A code example for performing the detection using OpenCV function detectMultiScale is available on GitHub or can be downloaded here.

The code example contains 30 images used to test the classifier. By changing the parameters of the function detectMultiScale it is possible to tune the classifier for different scenarios.

The image below shows four examples of detection using an LBP classifier.

detectball-examples

Results